

In the virtual world of today, it is essential that we know how to record your desktop screens. Whether it’s to record a live stream, create a video training for work, or a lecture for your students, you often need to record your computer screen and audio together.
When you want a screen recorder with audio that can truly deliver amazing features for free, well, let’s just say your options are limited. No worries, however. We are going to break down the best FREE screen recorders on the market today. The criteria are based on screen capture abilities, audio recording capabilities, sharing options, and user-friendliness.
Hiding in the mess of the internet is DemoCreator and it may be the best computer screen recorder for Windows and macOS you have used thus far. It is the easiest and the handiest screen recorder out there.
In this article, we shall guide you through the steps of recording your computer screen and audio using DemoCreator.
Step by Step Guide of Recording Your Desktop Screen and Audio
Follow the steps given below to record your computer screen as well as audio using one of the best video editors, DemoCreator.
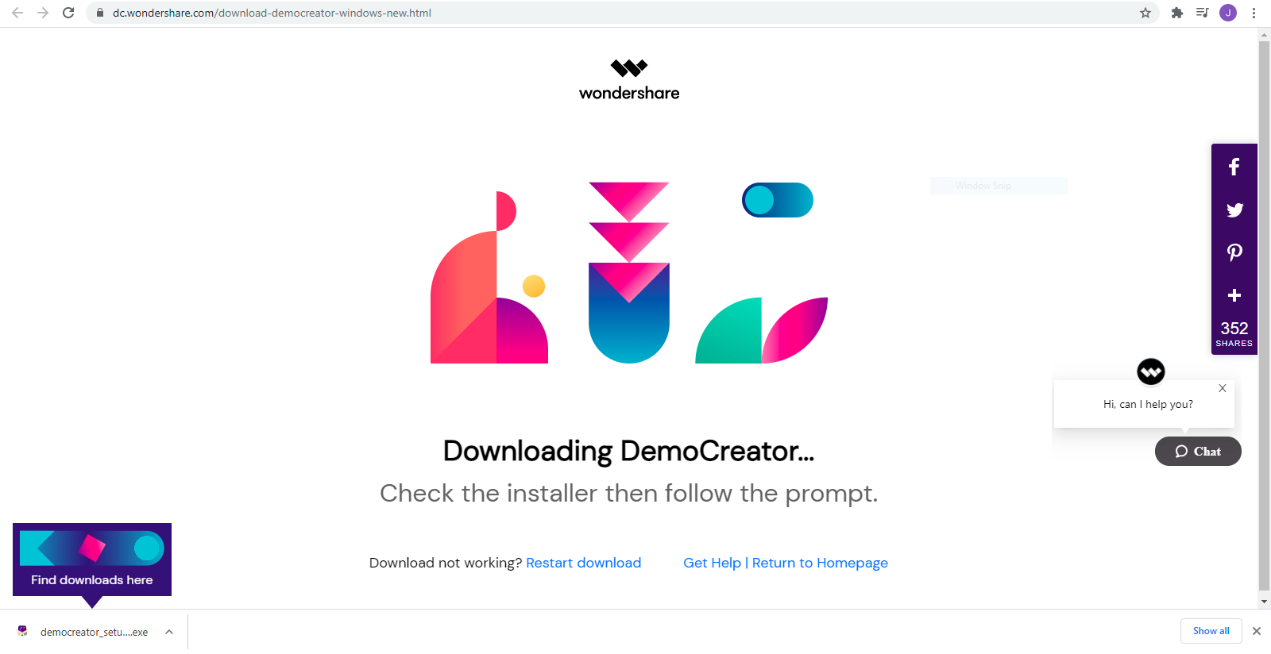
Step 1: Download and Install the latest version of DemoCreator for Windows or macOS from the official website.
Step 2: When you launch DemoCreator, a dialog box opens up. Click on “New Recording” to get to work immediately.
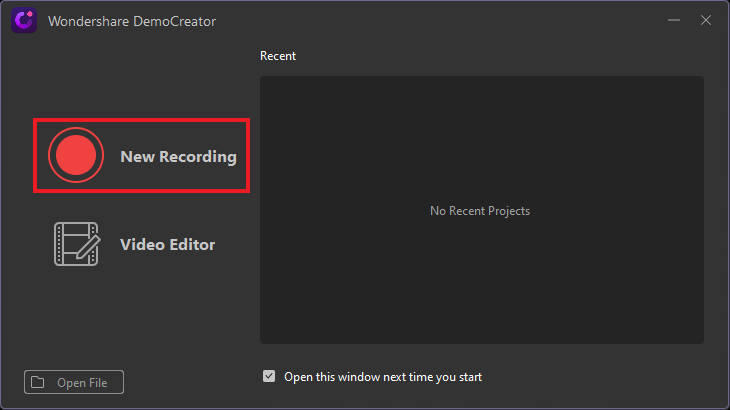
Press on “Start” in the “Recorder User Guide” dialog box.
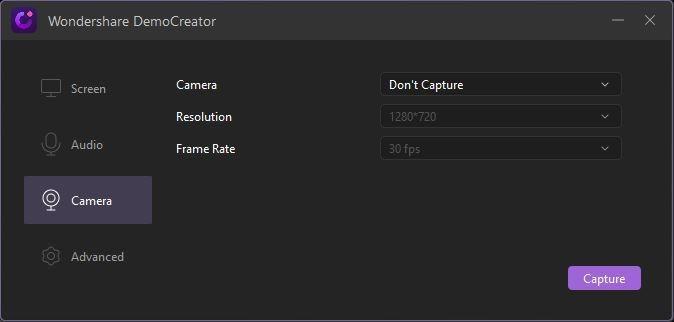
Step 3: Configure your screen and audio recording settings by clicking on the settings icon.

You can set the Screen, Audio, Camera, and Advanced settings as per your requirement.
Wondershare DemoCreator provides two options for Screen settings. If you are recording a live stream of your video game choose the second option. Otherwise, choose the “Screen Capture” option to record your screen. Click on the dropdown arrow to choose from different screen options. You can also set the dimensions of your screen by dragging the box when the recording interface appears.

For your Audio settings, DemoCreator has the ability to record the computer audio as well as the microphone audio at the same time. This means that you can add any background music to your voice to make your recording more appealing and fun!

And lastly, for your Camera settings, you can either disable the camera or use the “Integrated Camera” option from the dropdown to record your webcam video along with the screen.
In the Advanced settings, you can set the location of the file, encode the file, and set different shortcuts for yourself.
Step 4: After you have configured all the settings, click on “Capture.” You will be taken to the recording interface. Here, you can enable the “Screen Drawing Tool” to make different annotations during recording.
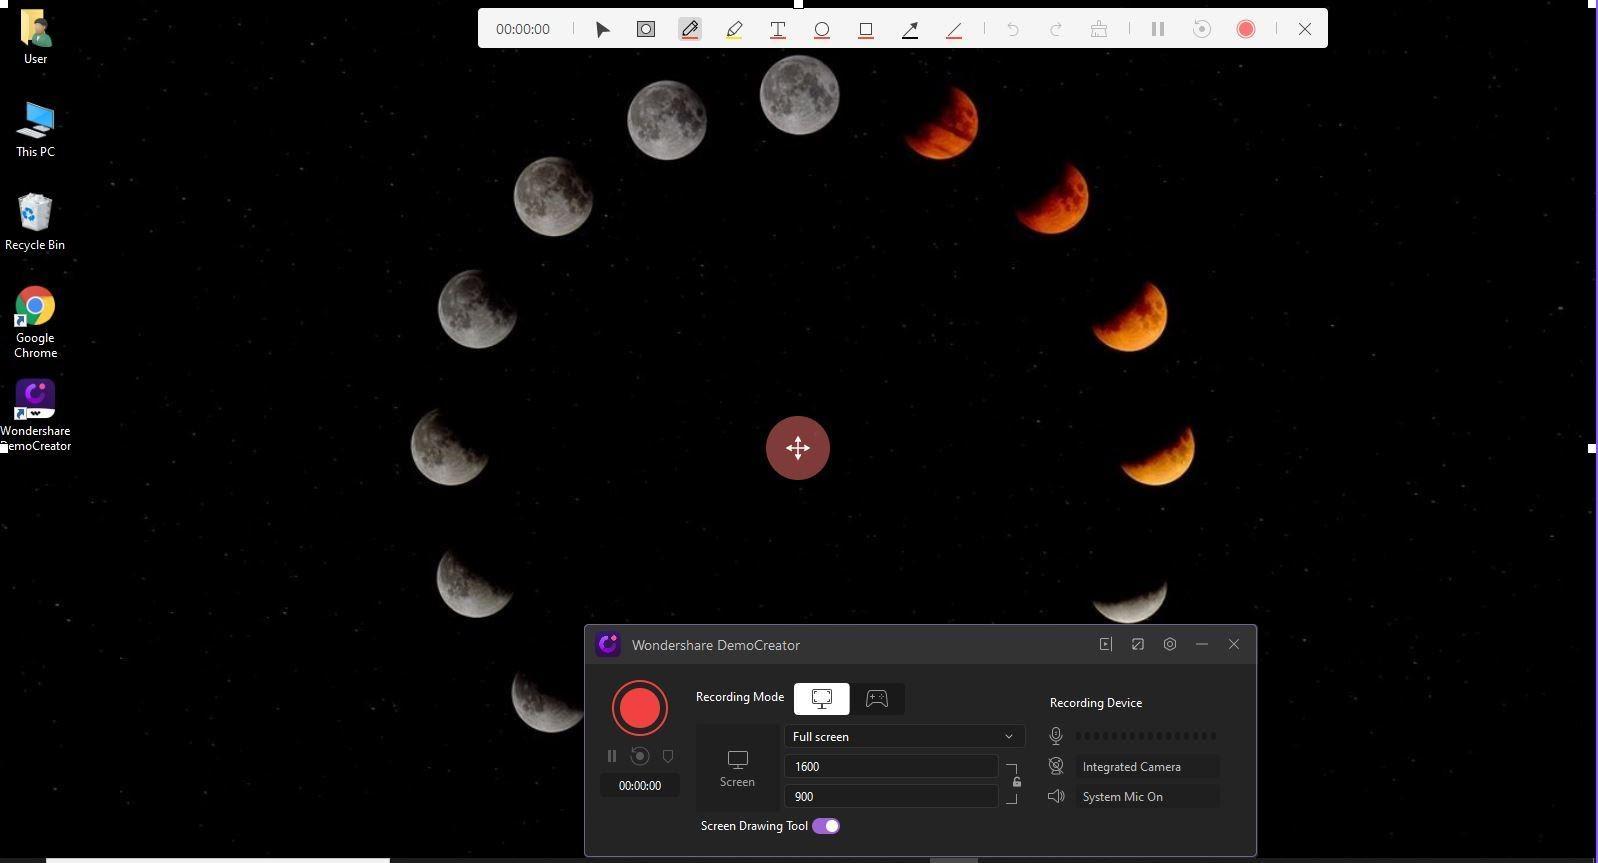
Step 5: Press the record button to start the recording.
Step 6: After you are done recording, press F10 to stop the recording. You will enter the video editing interface. If you do not wish to edit the video, simply click on “Export” on the top right corner of the screen to save it to the local disk or upload it on YouTube.

How to Edit Your Video and Audio using DemoCreator
The steps given above are enough for you if you are simply recording your screen and don’t require any sort of editing of your recording. However, if you want to tweak around with your recording, we shall give you all the details you need to know down below.
Firstly, we shall familiarize you with the editing interface. There are four main components of the editing interface: Media Library, Preview Window, Timeline, and Properties Window.
The Media Library contains all the media that you use while editing the recording. The Preview Window gives you a preview of your recording as you edit it. The Timeline contains the audio and video tracks for you to edit separately or together. The Properties Window shows the audio or video properties of your track so you can set them as per your requirement.

Now, we shall look into the details of the video and audio editing tools.
- When you stop your recording, DemoCreator automatically takes you to the video editing interface. Your screen track (video and computer audio) will in the bottom timeline whereas the microphone track will be in the upper timeline.

- Tap on the audio track to get the audio properties in the Properties Window. Here you can set the audio volume, denoise the audio and alter its speed.
- Furthermore, you can also add a voiceover if you are not satisfied with the original microphone audio. To add a voice-over, press on the mic option above the timeline. You will get a “Record Audio” pop-up window. Choose your choice and press the record button.
- Moreover, you can also add captions, annotations, stickers, transitions, effects to your video to explain it fully. You also have some cursor options and templates to use too.
After you are done editing your recording, export it in the same way as mentioned previously.
Conclusion
After a long search for a good video editor as well as a screen recorder, we conclude that Wondershare DemoCreator is one of the best ones. It has all the necessary tools and features but most importantly, it is free of cost.
We are sure that it is the most appropriate and user-friendly screen recorder for you. So, hurry up, download it and get recording.